


-

Mimic Party
-

Blob Opera
-

The Choicest Voice
-

SpongeBob Is This How You Get Your Sick Kicks
-

Hiding from Randall Monsters Inc
-

Dance Moms – GET YOUR FINGER OUT OF MY FACE
-

Doppio switch into Diavolo
-

SpongeBob SquarePants – Insultin a mans ship
-

Ichigo vs Grimmjow
-

Family Guy Peter Does Crack
-

TAWOG Have You Noticed That Your Voice Has Changed – The Castle
-

Kung Fu Panda o sigma da Bahia
-

Peter Griffin Plays Call of Duty Dub
-
Stutter incident – Joe Bart
-

No This Is My Lolly
Building Your First Voice Pack
A Step-by-Step Guide
The slot system and folder structure behind Voice Packs are mechanical — get the naming right and a file loads, get it wrong and it doesn’t. That part is worth understanding once and moving past. What actually determines whether your first pack is any good to play with is everything around that mechanical layer: what you choose to record, how you record it, and how you sequence the work so you don’t burn out three clips into a pack you planned to build fifty of. This guide focuses on that side of things — the production process, not the file-naming rules.
Decide What Kind of Pack You’re Actually Making
Before recording a single clip, it helps to know which of these you’re aiming for, since each one shapes your recording session differently:
- A personal pack for yourself. You can be looser with consistency and just record what you enjoy performing, since you’re the only one who has to live with any rough edges.
- A pack for a specific group of friends. Worth building around material that group already knows, rather than what you personally find funniest — the pack only works if the people using it recognize the source.
- A pack meant to be shared publicly. This is where consistency actually matters — audio levels, trimming, and variety all need to hold up for people who have no context on why you chose what you chose.
Naming the goal up front changes how much polish is worth investing in each individual clip, and saves you from over-engineering a pack that was only ever meant for one Friday night with friends.
Recording in Batches, Not One Clip at a Time
The instinct on a first pack is often to record one clip, test it, record the next, test that one, and so on. It works, but it’s slow, and it makes it hard to judge how the pack feels as a whole until you’re already deep into building it. A batch approach tends to hold up better:
- Gather all your source material first. Line up everything you plan to pull clips from before you record anything, so you’re not interrupting a recording session to go hunt for more material.
- Record in one sitting where possible. Your voice, mic positioning, and background noise level all drift slightly session to session — clips recorded in one sitting tend to sound more consistent with each other than ones stitched together across several days.
- Batch by category or mood, not by source order. If your pack spans multiple tones — energetic lines, deadpan lines, angry lines — recording all of one mood back to back helps you stay in that headspace, rather than emotionally whiplashing between tones clip to clip.
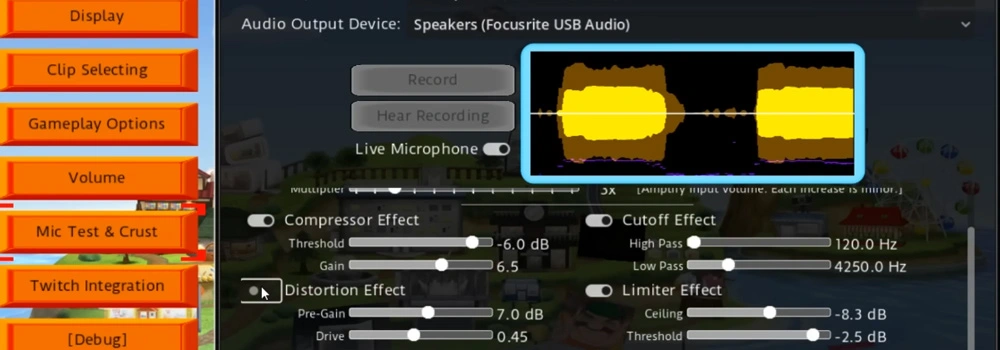
Getting Consistent Audio Across an Entire Pack
Nothing makes a pack feel more amateurish than clips that visibly vary in volume or background noise from one to the next — even if every individual clip sounds fine in isolation. A few habits that help:
- Record at a consistent distance from your mic for the whole session. Moving closer or further between clips is one of the most common causes of volume inconsistency in a finished pack.
- Do a quick playback check every several clips, not just at the very end. Catching a levels problem three clips in is a much smaller fix than catching it after forty.
- Trim silence at the start and end of every clip the same way. A pack where some clips have a beat of dead air before the line starts and others cut in instantly feels inconsistent even if no individual clip is technically wrong.
- Re-record rather than patch. If a clip has a stumble or a stray noise, it’s almost always faster and cleaner to record it again than to try to edit around the problem.
Sizing a Pack So It Actually Holds Up in Play
A pack that feels like plenty of content while you’re building it can run dry surprisingly fast once you’re actually playing rounds with it. A few things worth planning around before you decide you’re done:
| Pack Size | How It Plays | Good For |
|---|---|---|
| A handful of clips | Runs out in a single sitting, fine for a quick test but thin for repeat play | Testing whether a slot naming setup works before committing to a bigger build |
| A couple dozen clips, single mood | Holds up for a solo session or two, starts repeating in group play | Focused personal packs built around one specific voice or bit |
| A couple dozen clips, split by mood or category | Feels varied even on repeat plays, since you’re not hearing the same emotional register back to back | Packs meant to be played more than once or with a group |
If you’re not sure how big to go, it’s usually better to build a smaller pack with real variety in tone than a larger one where every clip hits the same emotional note.
Getting a Second Opinion Before You’re “Done”
It’s easy to lose perspective on your own pack after spending hours building it — clips you’ve heard dozens of times during recording stop sounding the way they’d sound to someone hearing them fresh. If you’re building for anyone other than just yourself, it’s worth having someone else run through a few rounds before you consider it finished:
- Watch whether they can actually tell what the source material is, especially if you’re pulling from something niche.
- Notice which clips they react to and which ones fall flat — that’s a better signal for what to trim or replace than your own judgment after hours of familiarity.
- Ask specifically about audio consistency, since that’s the thing you’re least likely to notice in your own work after long exposure to it.
The technical side of a Voice Pack — folders, slot names, the game reading your files correctly — is a solved problem the moment you get it right once. What separates a pack that’s genuinely fun to play repeatedly from one that gets used twice and abandoned is almost entirely about the production choices covered here: what you chose to record, how consistently you recorded it, and whether you sized it to actually last. Get the process right, and the mechanical part barely matters.