












Dub Mode
A Practical Guide to Voiceover Recording in The Choicer Voicer
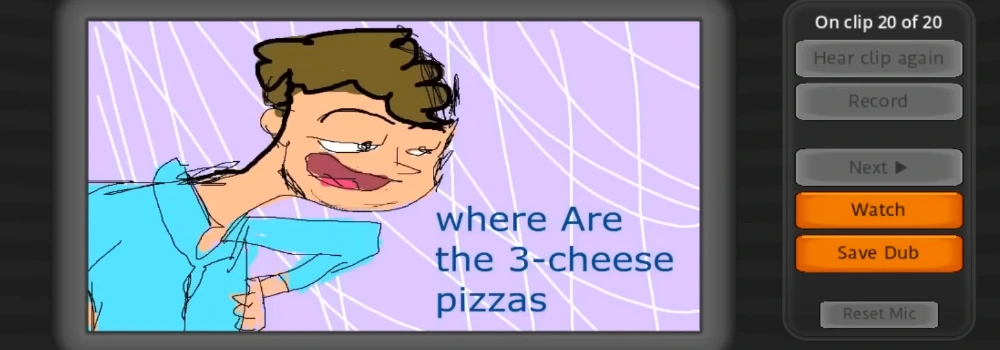
Dub Mode is the one part of The Choicer Voicer that isn’t chasing a score at all. Instead of a judge panel grading a short round, you’re recording a full voiceover pass over a longer scene, matching your delivery to the video in real time. The goal isn’t points — it’s ending up with a take you actually want to keep. That shift changes how you should approach it compared to a standard scored round, and this guide walks through picking footage, building a practice workflow, and getting a take you’re happy with.
How Dub Mode Differs From a Scored Round
A standard round is short by design — a few seconds of clip, one attempt, an immediate score, next round. Dub Mode strips that structure out entirely. You’re working against a longer stretch of footage, there’s no score at the end, and the whole session is closer to a small production than a competitive round.
That difference matters for how you prepare:
- Sustained delivery is a different skill than a quick line. Holding a character’s voice, energy, and pacing consistently across minutes of footage is harder than nailing one punchy line.
- There’s no immediate feedback loop. Without a judge panel scoring you round to round, you’re relying on your own ear (or a rewatch) to know if a take worked.
- A single mistake doesn’t end the attempt. Unlike a scored round where one bad line tanks the whole score, Dub Mode is closer to a real dubbing session — you can often push through a rough patch and still end up with a usable take.
Picking Footage to Dub
What you choose to dub matters more here than in a standard round, since you’re committing to it for the length of the whole scene rather than a few seconds.
- Sort or filter available footage by character or file if you’re practicing a specific voice repeatedly, rather than pulling something random each time. Consistency helps you actually improve at one voice instead of skimming across many.
- Start shorter than you think you need. A scene that feels manageable in your head can run longer in practice once you’re actually holding a voice and reading pacing at the same time.
- Match footage to what you’re trying to practice. A scene heavy on rapid back-and-forth dialogue trains timing; a slower, monologue-style scene trains sustained tone and emotional consistency.
A Practice Workflow That Actually Builds Skill
Dub Mode is genuinely useful as a training tool for the same fundamentals that scored rounds test — pitch, timing, emotional read — just without the pressure of an immediate grade. A structured approach gets more out of it than just hitting record and hoping:
| Step | What It Does |
|---|---|
| Watch the scene once with sound, no recording | Builds familiarity with pacing and tone before you’re also managing your own delivery |
| Record a first pass with original audio audible | Lets you lean on the reference while you find the character’s rhythm |
| Mute the original clip audio for later passes | Forces you to hold timing and tone on your own instead of unconsciously syncing to what you’re hearing under your own voice |
| Review the take against the video, not just by ear | Sync and pacing issues are often easier to catch visually than they are to hear in the moment |
Muting the original audio once you’re comfortable is worth calling out specifically — it’s an easy step to skip, but it’s the difference between practicing the voice and practicing your ability to shadow someone else’s timing.
Working With Longer Scenes
The longer the footage, the more a small issue early on compounds. A few habits help keep a longer dub from falling apart halfway through:
- Break long scenes into mental checkpoints rather than treating the whole thing as one continuous performance — knowing roughly where a tone or pacing shift happens ahead of time keeps you from being caught off guard mid-take.
- Don’t try to salvage every line in real time. If a single line goes rough, it’s usually better to keep going and stay in rhythm than to break character trying to fix it mid-recording.
- Re-record in sections if the mode allows it, rather than restarting an entire long scene over one weak stretch.
What a Good Take Actually Looks Like
Since there’s no score to chase, it helps to have your own bar for what “done” means. A take is generally worth keeping when:
- The character’s tone stays consistent across the full scene, not just the opening lines.
- Pacing holds up against the video without noticeably rushing or dragging in the back half.
- Any tonal shifts within the scene are reflected in your delivery, not just the opening emotional register.
- You’d be comfortable sharing the clip on its own, out of context — a decent test for whether a take is actually finished or just technically complete.
Dub Mode rewards a different kind of preparation than a scored round — less about nailing one clean attempt and more about sustaining a character across a whole scene. Pick footage deliberately, use the mute-original-audio step once you’re comfortable, and treat a rough patch mid-scene as something to push through rather than something to restart over. That’s really the whole shift: Dub Mode isn’t testing whether you can hit one good line, it’s testing whether you can hold a performance.